
REVIEW · KERRY
Slea Head Photo & Sightseeing Tour
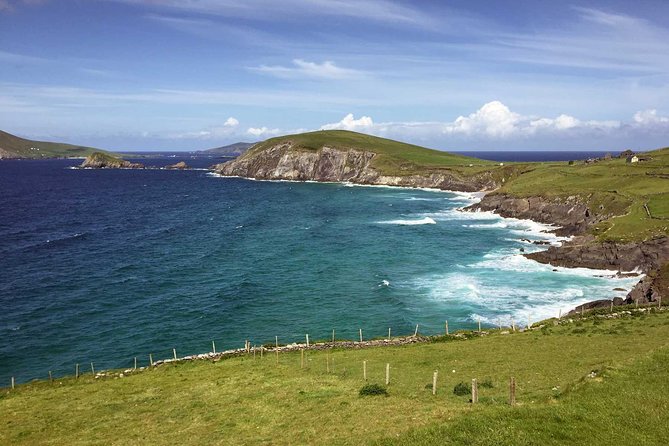
Slea Head is the kind of coast you want to slow down for. This 3.5-hour Dingle Peninsula tour trades big-bus rushing for a calmer pace, with photo tips and plenty of time at the best viewpoints and beaches.
I really like that it’s a small group, max 6, so you can actually hear the guide and move at your own comfort level. I also like the hands-on photo help, since the guide gives photography hints and will take pictures of you and your group with your phone or camera.
One thing to consider: it’s weather dependent, and several stops involve uneven ground or steps, including the steep path down to Dunquin Pier, so plan for a bit of walking and bring grippy shoes.
In This Review
- Key highlights at a glance
- Slea Head Drive, the way it should be done
- Price and what you get for $114.14
- Meeting in Dingle, right by the action
- The coastal start: Ventry to Slea Head viewpoints
- Stop 1: Slea Head Drive (about 20 minutes)
- Stop 2: Cross at Slea Head (about 20 minutes)
- Stop 3: Coumeenoole Beach (about 20 minutes)
- Dun Chaoin Pier to Dunquin: steep paths, big payoff
- Stop 4: Dun Chaoin Pier (about 20 minutes)
- Stop 5: Dunquin rocky beach and coastal path (about 20 minutes)
- Clogher Head and the Star Wars filming spot connection
- Stop 6: Clogher Strand and surrounding viewpoints (about 45 minutes)
- Inland change of pace: Gallarus Oratory
- Stop 7: Gallarus Oratory (about 30 minutes)
- Kilmalkedar Church ruins and the needle hole
- Stop 8: Kilmalkedar Church (about 20 minutes)
- Stop 9: Back to Dingle (about 15 minutes)
- Who this tour is best for
- Small-group pacing, plus flexibility when weather shifts
- Should you book the Slea Head Photo & Sightseeing Tour?
- FAQ
- How long is the Slea Head Photo & Sightseeing Tour?
- What does it cost per person?
- Where do I meet the tour, and where does it end?
- Is pickup offered?
- How many people are in each tour?
- What language is the tour offered in?
- What photography help is included?
- Are snacks or drinks included?
- Do you pay admission fees at the stops?
- What happens if the weather is poor?
- What is the cancellation policy for a full refund?
Key highlights at a glance
- Max 6 travelers keeps this from feeling chaotic
- Photo tips plus photo-taking means you do not need to play tripod all day
- Slea Head Drive stops at the exact places that create postcard angles
- Tide affects the best beach moments, especially at Clogher and Coumeenoole
- Ancient stone sites like Gallarus Oratory and Kilmalkedar Church add variety inland
- Dingle return loop so you end right where you started
Still heading west? More of Slea Head
- Exhilarating Rib experience – Dingle sea safari★ 5.0 · 1,349 reviews
- Dingle Dolphin Blasket Adventures★ 4.5 · 1,126 reviews
- The Great Blasket Island Experience – Premium Tour★ 5.0 · 597 reviews
- Dingle Peninsula and Slea Head Drive Group Tour★ 5.0 · 427 reviews
Slea Head Drive, the way it should be done
If you care about photos, the Dingle Peninsula can be tough. Pull off, grab a shot, get back in the car, repeat. This tour fixes that by building in time at each viewpoint, plus a guide who pays attention to what you are trying to capture, not just where the bus needs to be next.
The big value here is the small-group feel. With up to 6 people, the van stays relaxed, and you get time to step out, look around, and actually take in what you are seeing. The guide, George (from the tour’s own on-the-ground experience), is also a photographer himself, so the coaching feels practical, not scripted.
You also avoid the common “Dingle day” problem where you end up spending most of your time behind the windshield. This route is still a drive, but it is a drive with real stops, including beaches, coastal roads, and stone heritage sites.
Price and what you get for $114.14
At $114.14 per person for about 3 hours 30 minutes, this is not a budget-only option. The reason it can still feel like good value is what is included:
- Private transportation (not a packed coach)
- Photography hints and tips for scenery and people
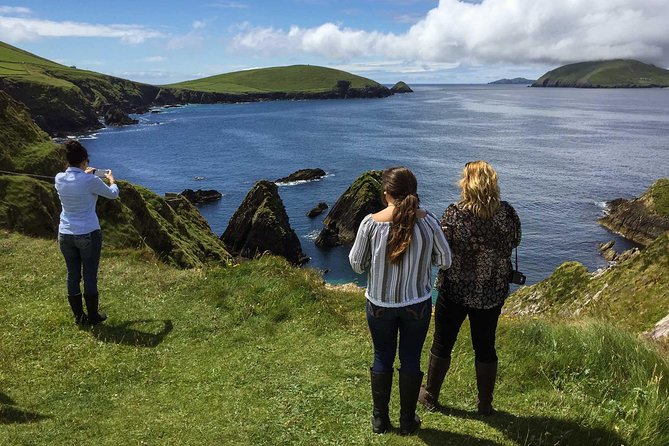
- The guide is happy to take photos of you and your group using your phones or cameras
That combination matters if your group includes non-photographers. You get help setting up shots, and you still get out of the vehicle often enough to enjoy the coastline, not just watch it.
What is not included is equally clear. Snacks and drinks are not provided, so if you are doing this in the middle of the day, I suggest you eat before you start or bring something simple to hold you over.
Meeting in Dingle, right by the action
You meet at the Dingle Tourist Information Centre on The Quay. Pickup is offered, and the meeting/pickup reference point is the Fungi Dolphin Statue beside the tourist office.
The tour ends back at the meeting point, so you do not have to plan a separate return. That is helpful in Dingle, where parking can be tight and your day can get eaten up by logistics if you are not careful.
The coastal start: Ventry to Slea Head viewpoints
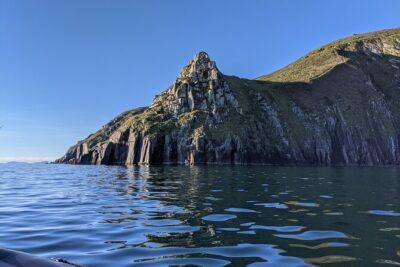
The tour begins with a scenic run along Slea Head Drive, heading out from Dingle through rural countryside and toward dramatic ocean drops. One early highlight is the stop area near Ventry, including passing the deep water natural harbour at Ventry before you reach your first viewpoint at Slea Head.
Stop 1: Slea Head Drive (about 20 minutes)
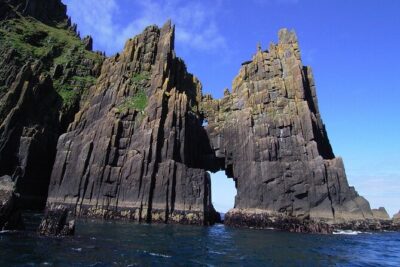
This first stop is your warm-up: ocean views, cliff edges, and the kind of light where you can quickly test angles. If you are trying to capture coastline depth, this is the time to practice framing while you have time and the group is still fresh.
A small caution: if the wind is up, keep an eye on your grip and be ready for salt spray. Nothing ruins a photo day faster than getting sandblasted right after you finally nail focus.
Stop 2: Cross at Slea Head (about 20 minutes)
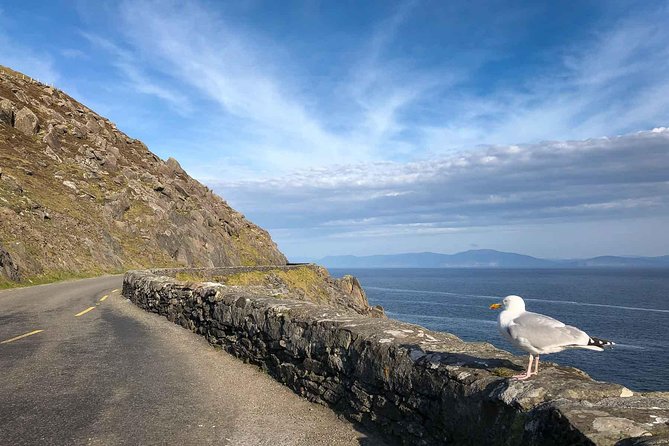
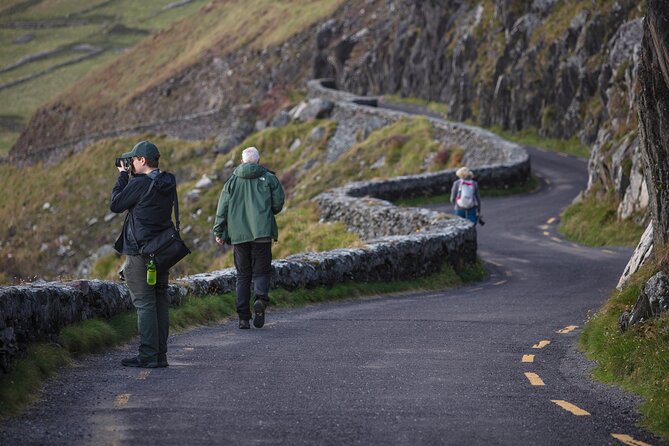
Next you reach the Cross at Slea Head, where the views are built for photos and quick walks. There is an option to stroll along the winding oceanside road for a few minutes, which is perfect if you want to get one or two different perspectives without committing to a long hike.
This is also a great stop for group photos. The guide’s photo help comes into play here because you get ideas for how to position people against the coastline and how to keep the horizon from looking crooked on your phone.
Stop 3: Coumeenoole Beach (about 20 minutes)
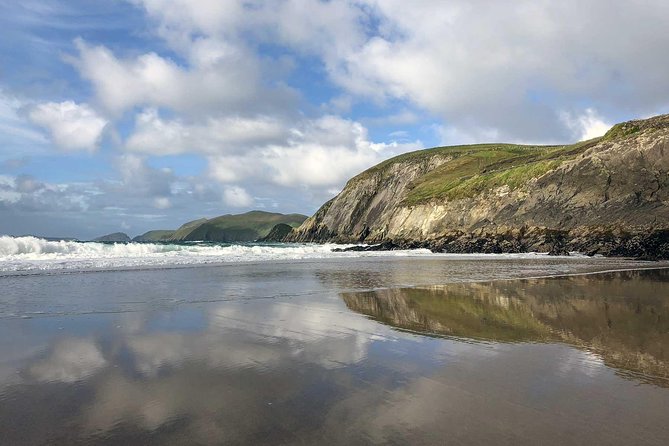
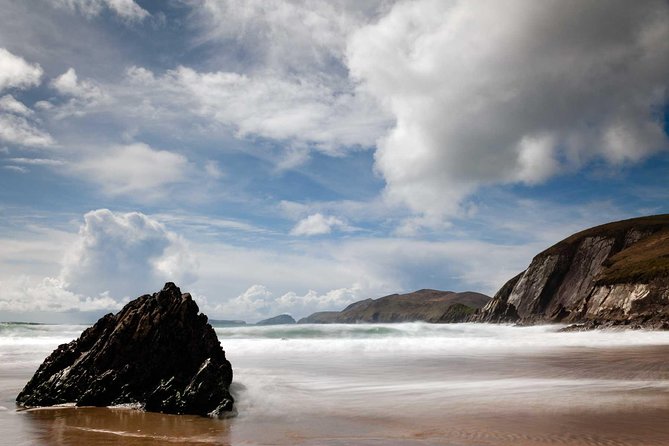
Coumeenoole Strand is where many people relax. You can take photos, or you can simply kick off your shoes and wander at the water’s edge.
A key detail is tide. The itinerary notes that you can get fine views from the beach at low tide, and you can also walk down to the sands via the nearby walkway. If you are photographing, low tide can expand what you can include in the frame, like wet rocks, shoreline texture, and long lines of coast.
The only downside is that 20 minutes is not a lot of time if you decide to do a longer beach stretch. If you want both photos and a proper stroll, pick one priority and keep it moving.
Dun Chaoin Pier to Dunquin: steep paths, big payoff
After the beach-and-road segment, the tour pushes into the places that feel more rugged and historical.
Stop 4: Dun Chaoin Pier (about 20 minutes)
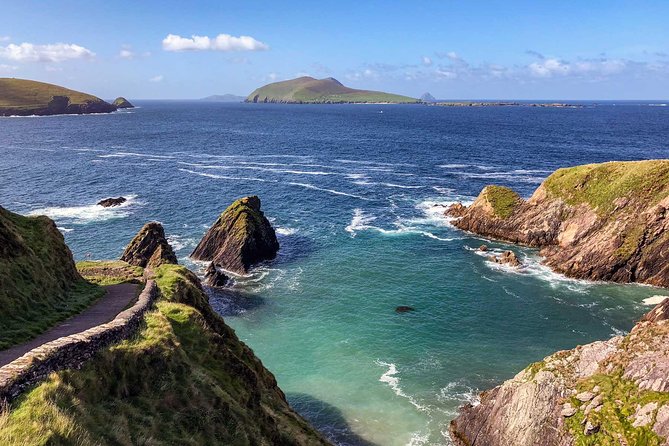
This is the iconic twisting path down to Dunquin Pier, described as a historical departure point for settlers on the Great Blasket Island. Today, it’s used for trips to the island by boat, so it still has that “people come here for a reason” energy.
You have options at this stop. You can capture shots along the paths at the cliff top, and you can also choose to walk down the steep path for lower vantage points. The walking choice is your call, but I recommend you at least go partway down if your legs are good. Those lower angles often look more dramatic than top-of-cliff photos.
Practical note: bring footwear with grip. The ground around cliff paths can be uneven, and a quick slip does not help anyone’s camera day.
Stop 5: Dunquin rocky beach and coastal path (about 20 minutes)
From there, you arrive at Dunquin, with rocky beach scenery and access to a coastal path for views across the rugged shoreline. The Blasket Islands sit in the background, giving you depth and an added layer of interest even if the weather is moody.
This is another stop where 20 minutes can fly. If you want the best shot, arrive ready to move. If you want the best atmosphere, arrive ready to slow down.
Clogher Head and the Star Wars filming spot connection
The Clogher segment is where the tour turns from coastline drama to wider panoramic views, plus a little pop-culture trivia for people who like that kind of context.
Stop 6: Clogher Strand and surrounding viewpoints (about 45 minutes)
You stop at Clogher Head for panoramic views of the western edge of the Dingle Peninsula. The notes also call out that this area includes the filming location for Star Wars in 2016, which can be a fun hook for movie fans while you wait for the light to change.
A few minutes away is Clogher storm beach, and access depends on tide conditions. You are also told there are secluded rocky beaches and rugged coves you can reach with a short drive.
This is the longest stop on the tour at 45 minutes, which is a good sign if you like flexibility. You can split your time between:
- looking at the wide views from above
- photographing the shoreline
- stepping onto areas that are only accessible when the tide is right
If you are planning your wardrobe, this is the stop where a windbreaker can be worth it. The headland exposure is real, and even when the sun peeks through, the coastline can stay chilly.
Inland change of pace: Gallarus Oratory
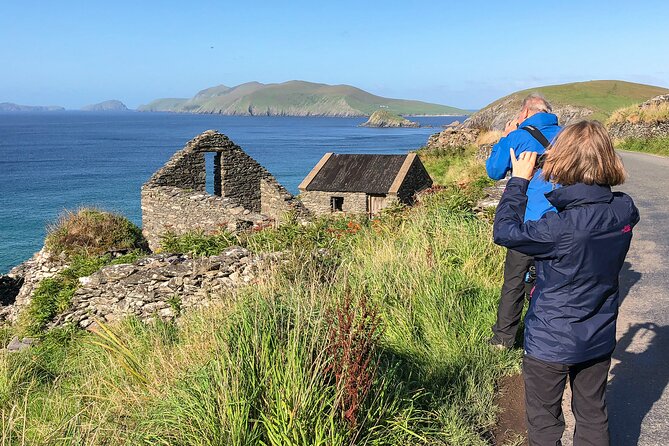
After beaches and cliffs, you get a quieter, more ancient scene.
Stop 7: Gallarus Oratory (about 30 minutes)
The tour includes a drive to Gallarus, home to an 8th century oratory with a roof described as stone. This stop is all about texture, scale, and the strange beauty of older architecture placed in a dramatic rural setting.
You will have time to observe and take photos. If your camera is set for wide coastline shots, slow down here and let the building fill the frame. Stone roofs look good in softer light, and this stop tends to reward patient viewing rather than fast clicking.
Also, this is where you might appreciate that the tour is not only about the coast. It breaks up the day so you do not end up with 90 minutes of cliffs and waves only.
Kilmalkedar Church ruins and the needle hole
Next comes another inland heritage stop, and it adds details that are visual, not just spoken.
Stop 8: Kilmalkedar Church (about 20 minutes)
You visit the ruins of a 12th century Romanesque church, built on an earlier monastic site. The notes highlight a standing stone with a “needle hole” and ogham script carved down the side. Nearby is also a large cross carved from stone, and you can access views of the church in the rural landscape.
This is a stop for people who like close-up detail. On phones, it helps to clean your lens and focus carefully on the carvings. If your group has photographers and non-photographers, this stop is still good because you get both the big “ruins in the fields” look and the close detail moments.
If you want one simple strategy: take one wide photo first, then switch to close shots of the stone markings.
Stop 9: Back to Dingle (about 15 minutes)
Finally, you do a scenic 15 minute drive back to Dingle to finish the tour. It is enough time to reset your thoughts and figure out what you want to do with the rest of your day in town.
Who this tour is best for
This tour shines for:
- people who want small-group access without feeling rushed
- anyone who wants help getting good photos of people, not just scenery
- visitors who prefer a mix of coastline views and heritage stops in one half-day plan
- groups who want someone else to drive so you can focus on what is outside the window
It may be less ideal for:
- people who hate walking even short, uneven stretches. Some coastal paths are steep, especially near Dun Chaoin Pier.
- travelers who want a lecture-style history lesson. The emphasis here is photo and sightseeing, with history presented as part of what you see.
Still, the stops at places like Gallarus Oratory and Kilmalkedar Church give you enough real-world context to make the day feel meaningful, not random.
Small-group pacing, plus flexibility when weather shifts
A theme in the tour experience is that it stays relaxed. You get time at each place and you can choose walking options at key viewpoints. That matters, because the Dingle Peninsula is all about looking, not racing.
The tour also has a practical weather reality built in. It requires good weather, and if it gets canceled for poor conditions, you are offered a different date or a full refund. I like that you are not left in limbo with no plan.
Should you book the Slea Head Photo & Sightseeing Tour?
I think you should book if your main goal is the Dingle Peninsula coastline with time to actually shoot photos, plus a guide who will help you frame people and landscapes without making it feel like a formal class.
You should pause and consider other options if your group needs a fully seated experience. Between rocky beach areas, cliff paths, and at least one steep descent, this tour is still doable for most people, but it is not a no-walking day.
If you want a half-day plan that feels personal, not rushed, and gives you a set of stops you might miss on your own, this one is an easy yes for many Dingle first-timers.
FAQ
How long is the Slea Head Photo & Sightseeing Tour?
It runs for about 3 hours 30 minutes.
What does it cost per person?
The price is $114.14 per person.
Where do I meet the tour, and where does it end?
You meet at the Dingle Tourist Information Centre at The Quay, Farrannakilla, Dingle, Co. Kerry. The tour ends back at the same meeting point.
Is pickup offered?
Yes, pickup is offered. The pickup reference point is the Fungi Dolphin Statue beside the Tourist Office in Dingle.
How many people are in each tour?
This tour has a maximum of 6 travelers.
What language is the tour offered in?
The tour is offered in English.
What photography help is included?
The tour includes photography hints and tips, and the guide is happy to take photos of you and your group using your phones or cameras.
Are snacks or drinks included?
No, snacks and drinks are not included.
Do you pay admission fees at the stops?
Admission tickets are listed as free for the stops on this tour.
What happens if the weather is poor?
This experience requires good weather. If it is canceled due to poor weather, you will be offered a different date or a full refund.
What is the cancellation policy for a full refund?
You can cancel for a full refund up to 24 hours before the experience start time. Cancellation within 24 hours of the start time is not refunded.
The Wider Dingle Pile
West of Dingle
Elsewhere on The Ireland Traveler
Lately added to the Dingle pile
- Fishing 2 hour Private
★ 5.0 · 3 reviews - Private Tour: Dingle Peninsula from Dingle
★ 4.0 · 5 reviews - Funky Pink Self Drive Boats
★ 5.0 · 6 reviews - Dingle Boat Tours RIB Adventure Private
★ 5.0 · 8 reviews - Dingle: Slea Head Drive Tour Full Day – Personal Chauffeur Guide
★ 5.0 · 8 reviews - Dingle to Blasket Island Ferry
★ 4.5 · 14 reviews
More Dingle Peninsula and Slea Head, side by side.
 ★ 5.0Exhilarating Rib experience – Dingle sea safariFrom $1201,349 reviews
 ★ 4.5Dingle Dolphin Blasket AdventuresFrom $931,126 reviews
 ★ 5.0The Great Blasket Island Experience – Premium TourFrom $141597 reviews
 ★ 5.0Full-Day Tour of the Dingle Peninsula, Slea Head, and Inch BeachFrom $72494 reviews
 ★ 5.0Dingle Peninsula and Slea Head Drive Group TourFrom $102427 reviews
 ★ 4.5Dolphin and Whale Watching Tour from DingleFrom $119318 reviews
 ★ 5.0Dingle Peninsula Four Hour Private TourFrom $556238 reviews
 ★ 5.0Blasket Island Sea Life Rib Tour,From $116202 reviews
Other lists this one is on